Wednesday, 28 November 2012

Pasta Shells Stuffed with Sausage, Spinach, Pumpkin and Ricotta

I had some pumpkin puree leftover from this delicious baking session, so I decided to try some stuffed shells and satisfy my carb craving.  These were easy and really tasty and I made them in side dishes which gave the dish a real restaurant feel.  This was comfort food kicked up a notch!


I started by boiling the shells, cooking the sausages and preheating the oven to 200°C.  I then slightly mixed about equal parts puree and ricotta cheese in a bowl, leaving chunks of cheese still intact, along with a handful of spinach.


Once the shells were cooked and the sausages fried, I sliced the sausages into small pieces and began to stuff.  There was no rhyme or reason, I just roughly divided the pumpkin,cheese and spinach mixture among the shells and stuffed each one with a piece of sausage (Uh oh...been watching too much Nigella).  Just before I started to assemble the pasta, I made a little tomato sauce by simply sauteing one finely chopped onion and adding a can of chopped tomatoes seasoned with some salt and pepper.  I let it simmer and then filled in around the shells with the finished sauce.  I grated a little Applewood Smoked Cheddar (my favourite cheese) on top, sprinkled a few pine nuts and baked it in the oven for about 20 minutes.

I'd like to try some other combinations; a cheese blend, roasted vegetables, or a seafood version?  I had really wanted to try a goat's cheese combination but the supermarket was out.  I did find some the next day, however and I'll be sharing that pasta dish tomorrow.  This is turning into a week of pasta posts but it derived from a weekend of pasta eating - what can I say, I love pasta!  (and I love winter jumpers that hide the fact that I love pasta!)


Tuesday, 27 November 2012

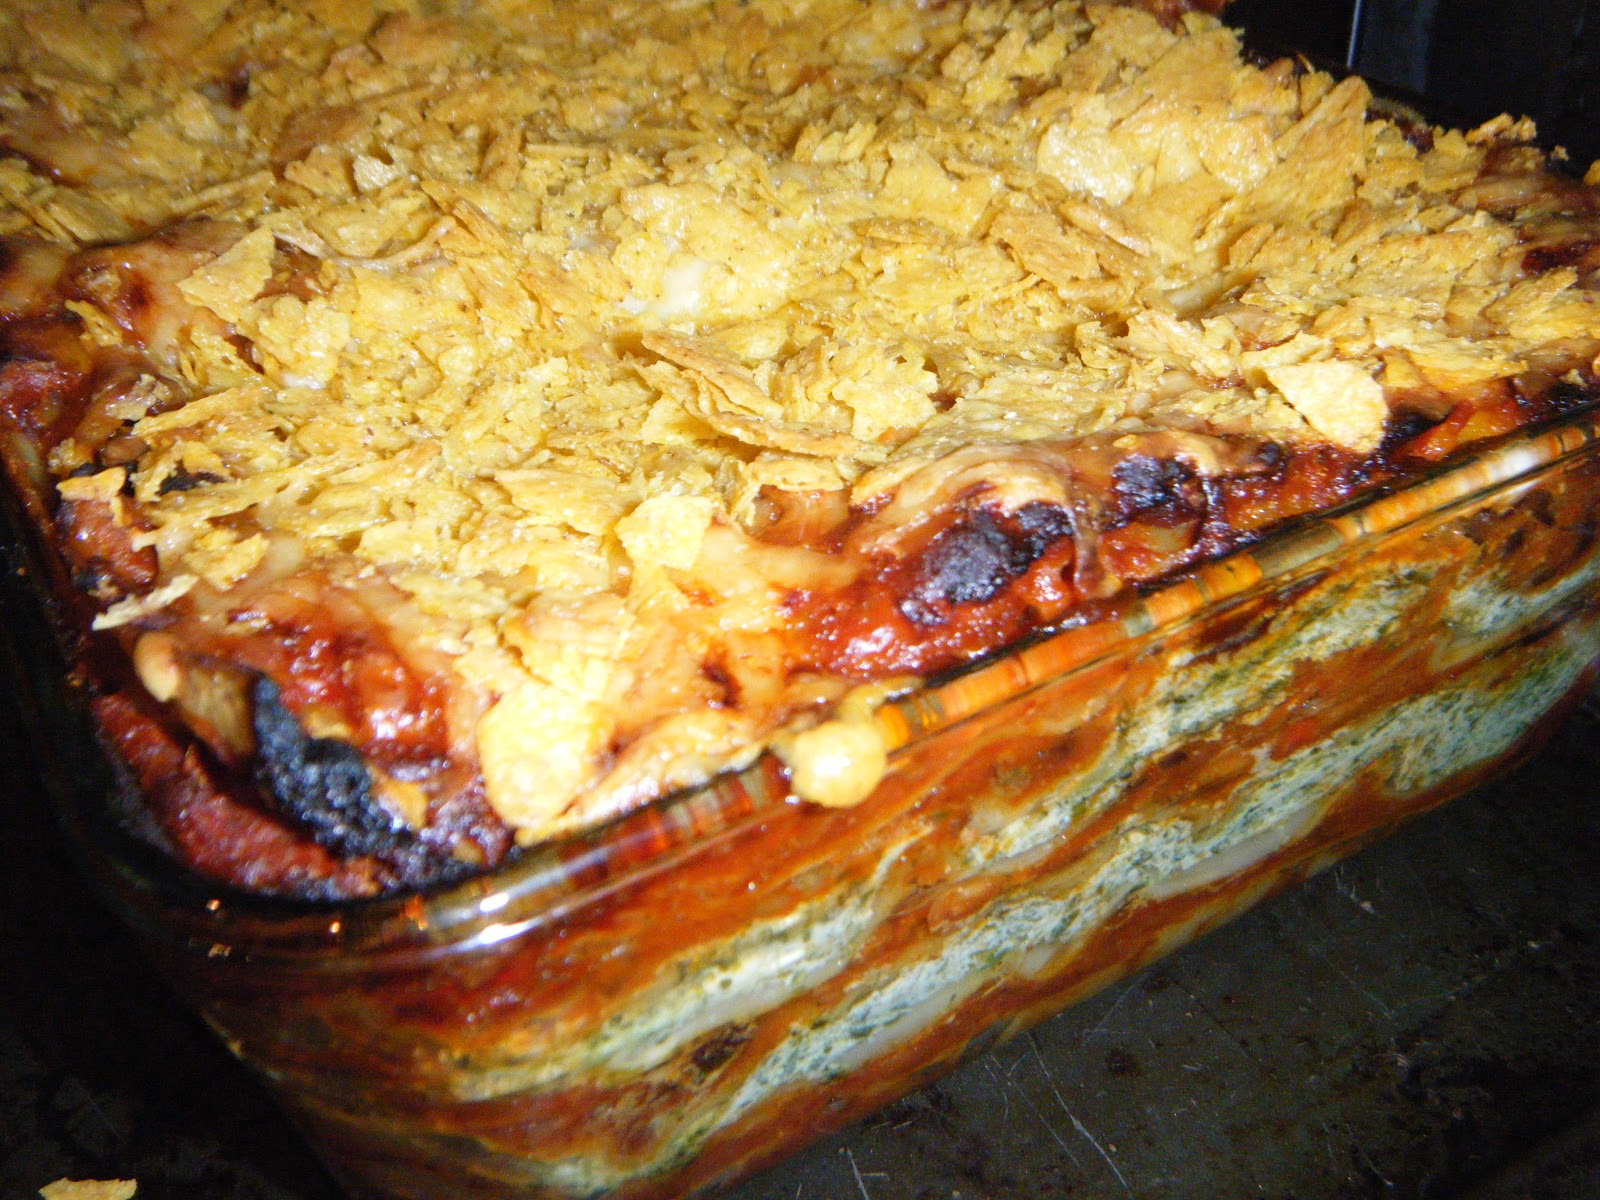
Spicy Chili Lasagna

So, you've made enough chili to feed the 5000 but only 8 showed up?  What to do with all of that chili?!  Make chili lasagna of course!


Leftover chili can be frozen as is.  I like to freeze it in single or double portions and then all we have to do is boil rice, cook some chips or bake a potato and dinner is done.  But seeing as though we ate this chili in a manner of ways on Saturday I decided to try something different (here I thought I was inventing something but it's been done before - it's ALL been done before!)

Here's my spin on it anyway.  I thawed some frozen spinach and mixed it with some ricotta cheese and set aside. Then in my lasagna pan (I thought for sure there would be a better name for such a pan but this is what it seems to be called and there's even one that gives everyone crispy edges no matter what slice you get!) I spread a little salsa at the bottom and began layering.  Let your ingredients guide you for this part and be creative.  You might like a lot of layers or a different type of cheese, or (gasp) no cheese at all!  I did one layer of chili and then one of the cheese with a little salsa and repeated about 3 times.  On the top layer, I spread a thin layer of grated cheddar cheese and crumbled some nachos chips for the pièce de résistance.  I baked it in the oven for about a half an hour at 200°C.  I served it with a dollop of sour cream on top.  This dish can be frozen as well, so perfect if you're all chili-ed out!  Which is what I am now after having had it for lunch for the last 2 days (and maybe one dinner).


Anyone else invent something only to find out you were way behind the times?  Though like my mother told me when I lamented, "Everything old is new again".

Monday, 26 November 2012

Beans beans the magical fruit...

Well, you get the idea.

Heinz baked beans are a staple in this house and probably in just about every home in England.  The fella first introduced me to beans on toast when we were living in New Zealand.  As backpackers, we saved most of our money for snowboarding, travelling, a little wine and once in a while, a fancy pants meal at one of their superb restaurants (I never would have guessed it but New Zealand has some of the most amazing food) but basic fuel for living was just that, basic!  It was all about cheap, cheap, cheap - though not so cheap that we would buy generic baked beans.  They had to be Heinz (the slogan don't lie)!  In NZ they were labelled "English Recipe" and they were the only beans allowed through the front door. 

A few months ago I spotted these at the end of the supermarket aisle:


They were on sale so I grabbed one of each flavour to have a try at home - there was also a chili flavour but that was eaten before I took this photo.  Not bad - I had never thought to spice up my beans like this before.  These are great if you fancy a different flavour but this can easily be achieved by adding a teaspoon of your desired spice or a few shakes of hot sauce or barbeque sauce.  For cheesy beans, uh... add cheese.  I'm not a convert.  I will be sticking to the original beans.

When I moved to England in 2007 , we upgraded to having beans on baked potatoes, but had never been anymore adventurous than that!  I then spotted this book in a shop and just had to get it for W.  Or rather, for him to have a skim through (lots of facts about beans - riveting stuff) and for me to get cooking with all the creative bean recipes - which you can check out here.  I haven't followed anything to the letter but the book has been a source of inspiration.  A can of beans is now my not-so-secret, secret ingredient in many of my favourite recipes.

I'm going to try and come up with some different recipes all centered around one common ingredient: (you guessed it) baked beans.  I'll share my favourites and staples around this house but also get creative and let you know what works and what doesn't.  I'll start with a time tested favourite around here: chili.

On Saturday night we had a few friends over and I made a big pot of chili (and one veggie chili for the non-meat lover; basically my regular chili without the meat and beef stock).  Not knowing how everyone liked to eat their chili; over rice or chips or in a bowl with some chunky fresh bread, I made everything.  I even threw in chili nachos for good measure.  Needless to say, we were stuffed.  I then cleared away the dishes and let everyone enjoy the evenings entertainment, which consisted of letting the 7 puppies loose around the living room and watching the madness that ensued. 

Slow-Cooker Chili (serves 4-6)

500 grams of beef mince
1 400g tin of chopped tomatoes
1 415g tin of baked beans
1 400g tin of kidney beans, drained and rinsed
1 medium onion, chopped
1 green pepper, chopped into large chunks (optional)
1 cup of mushrooms, sliced (optional)
3 cloves of garlic, crushed
2 tablespoons of tomato puree
1 red chili, chopped (deseeded for less spice)
1 cube of beef stock dissolved in 100ml of boiling water
1/2 teaspoon of smoked paprika
1/2 teaspoon of cayenne pepper
splash of red wine (optional)

Brown the meat in a frying pan and then add to the slow-cooker.  Fry the onions until browned and add to the slow-cooker.   Toss everything else into the slow-cooker, stir, cover and cook on low for 6-8 hours or on high for 3-4.  Cooking time will really depend on what type of slow-cooker you have.  Serve over rice, or chips or nachos (or all three!) add  grated cheese and enjoy!

How do you eat your chili?  Until moving here it was always in a big bowl, covered in cheese and mopped up with fresh bread.  Now the possibilities are endless!  Anyone care to share their not-so-secret secret chili ingredient?   Or will you be taking it to the grave?


Friday, 23 November 2012

Canadian Treats

Yesterday, while picking up yet more newspapers and food for the puppies, I overheard a woman talking to a store assistant about how she couldn't find a turkey anywhere and how she wanted to make one for her American husband.  Being exceptionally nosey, I apologised for eavesdropping but explained that as a Canadian wanting a Turkey in October every year, I too struggle.  I suggested she go to Aldi where they have pre-stuffed breasts suitable for two and we got to talking about all the foods we miss from North America.  Turns out she had lived in Canada in her twenties and later in California with her husband.  She missed Swiss Chalet and cornbread.  I missed...well, just about everything!

Whenever I go back home to Canada (no matter how long I live away, I don't think I'll ever stop calling it home) I like to hit up all my favourite restaurants and stock up goodies to take back with me from the local supermarket.  When in Timmins (my hometown) it's a must to have Chez Nous poutine (in England it's called chips, cheese and gravy and it's not necessarily piled up in that order) and a good French Canadian breakfast at La Chaumiere.  I didn't get to do either of these things.  I also hardly made a dent in the list of restaurants and food I wanted to eat in Toronto either.  And when it came time to stock up for take home goodies, I was less than enthusiastic.  You see, I got the flu.  I was so nauseous, I could hardly look at food let alone eat it.  A blessing and a curse!!  I still managed to came back to England with a few goodies in my suitcase though and some extra room in my trousers (I've made up for it by chowing down on 11 cupcakes this week).

These are some of my favourites:

  • Kraft peanut butter is not only delicious but it comes in a decent sized container (I love the stuff and hate to run out!)
  • Always need a couple of boxes of KD in the cupboard for those nostalgic days (even though I wouldn't touch the stuff if I was living there now)
  • Lipton Chicken Noodle is my go-to soup when I'm sick.  Mom's tip - add crushed garlic!
  • Real Fruit Gummies are just tasty!
  • I love the little 100 calorie pack popcorn and haven't been able to find that here and the shakers are flavours that I've rarely seen here (My aunt and I did find Ketchup crisps once)
  • The Cinnamon Spread reminds me of days spent at my grandparents in Toronto as a child - my grandpa always has it on toast.
You're probably asking "but what about the maple syrup?!!"  I have about 4 large tins thanks to some lovely weddings guests from this summer's nuptials so I have enough to last to have pancakes everyday for a year! (more like month - I drench em!)

What are your favourite foods?  What would you bring with you on a dessert island?  What do you miss most when you're away from home?  My list is much longer but sometimes you just have to draw the line - and stay within your luggage allowance!


Thursday, 22 November 2012

Eat, Drink and Make Napkins

Happy Thanksgiving American friends!

Probably a bit late in the game to be starting this project for today's dinner but the napkins I'm about to show you would make a wonderful Christmas gift for someone.


In September I went to visit some very close friends of mine in Switzerland.  I was very excited to see what  their life was like there.  We toured Zurich, went to the spa baths, ate Luxemburgerlis, hiked in the hills, got some crazy virus...but let's not focus on that!

Going...

going...

gone...well nearly!

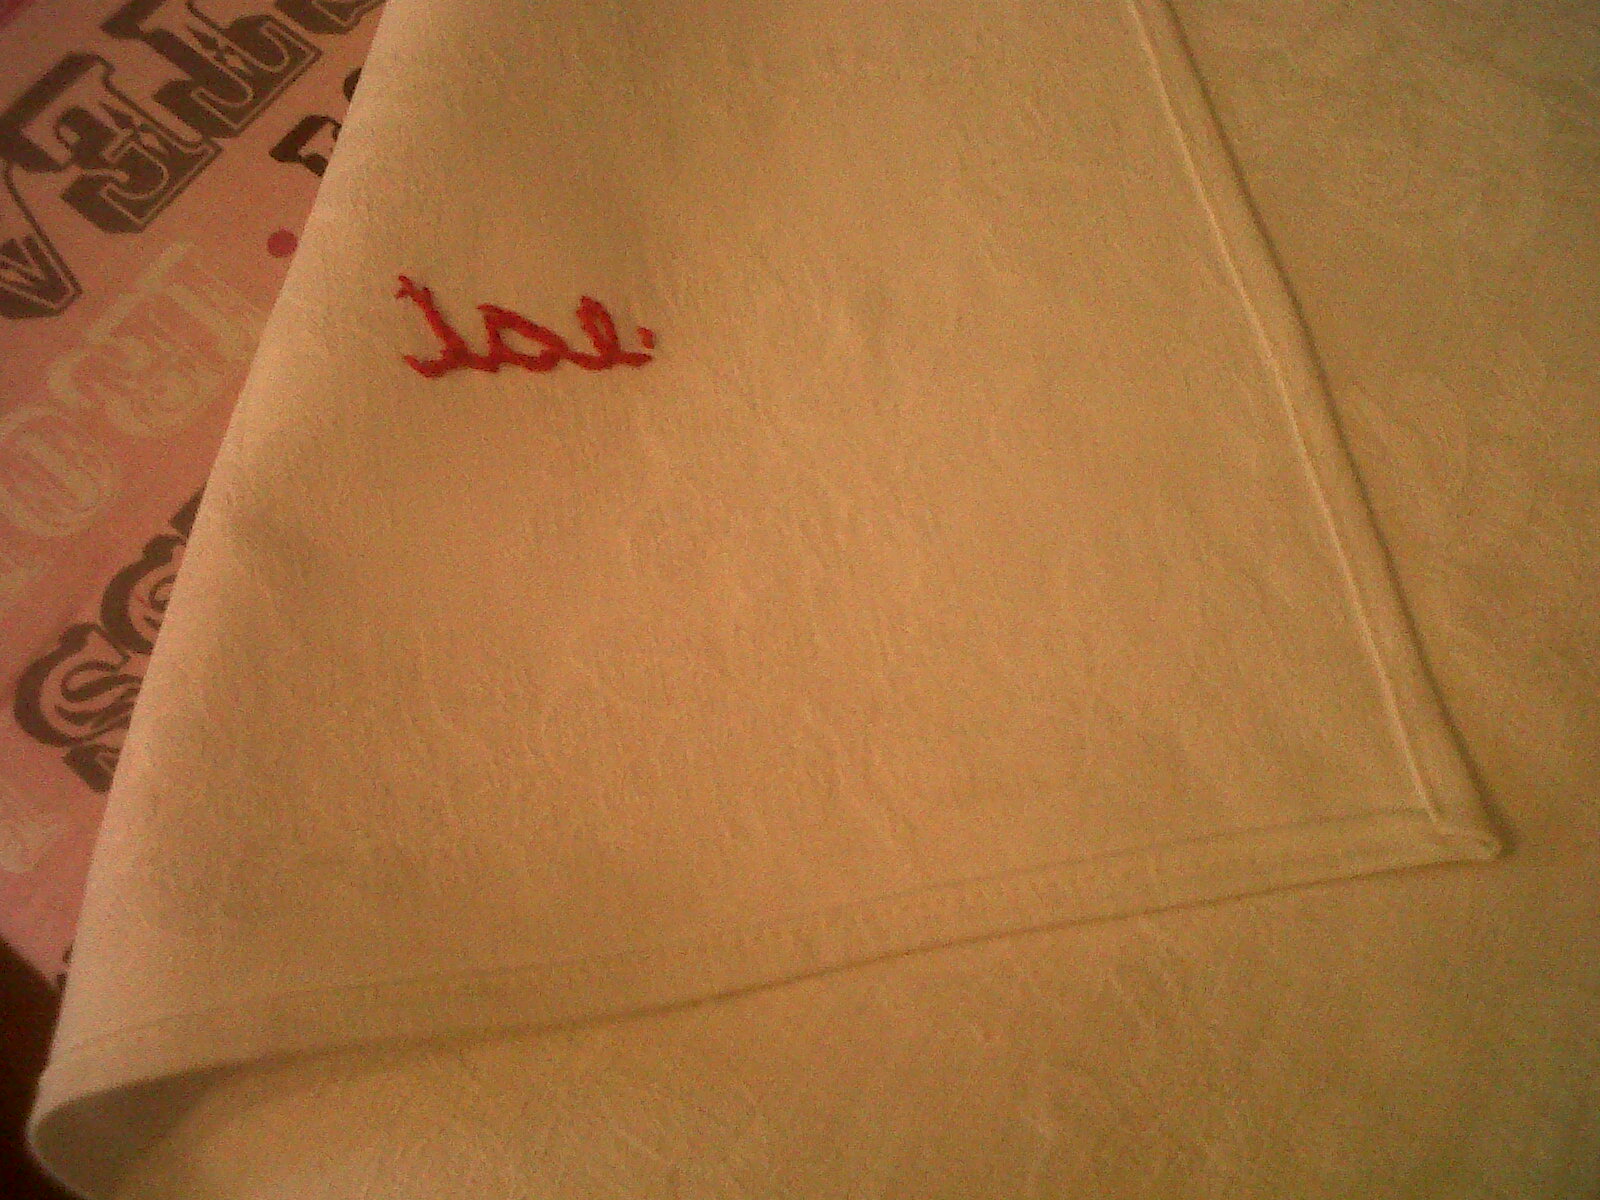
This fantastic couple had been married 2 years in August (I was a bridesmaid in their wedding and she in mine) so I wanted to bring an anniversary gift slash housewarming gift.  Cotton is the traditional gift for the second year of marriage and I thought handmade cloth napkins would really hit the mark.  I googled for ideas and came across this post from Heart of Light.  Perfect!  I really wanted to put my own spin on them and try some different words - I had wanted to try "eat" "drink" "be merry" (or "be married" because it was an anniversary gift?) "eat" in different languages would be fun too, but given as this was my first attempt at embroidery and napkin making I went with "eat" and repurposed a vintage (fancy word for second hand) table cloth just as Rachel did in her post.

I looked at a few videos on Youtube on how to make cloth napkins and a few embroidery ones too.  I went with 18 inch napkins so I cut 4 squares at 19 inches for a 1 inch seam allowance.  I ironed, pinned and sewed along the edges.  After 2 sewing courses and 2 years of owning a sewing machine, I have made 1 unhemmed skirt, cut the pattern for a jacket, hemmed our curtains, made 1 table cloth and this summer made dining room curtains with the help of a dear friend - who really knew her stuff!  I really need to up my game in the sewing department.

For the embroidery, I bought a small embroidery hoop for under a £1.00 and lightly wrote the word "eat" in pencil.  I then used a back stitch and followed the letters.  I was really pleased with them.  And so were my friends.  They actually already used cloth napkins so these were right up their alley.


The best bit was that they were easy and only took an afternoon to make (and that was while watching TV - imagine the things I could accomplish if I could just. turn. it. off.)  I'm really excited to get my sewing on again.  Handmade Christmas presents could very well be on the horizon!  And maybe some napkins for myself :)


Wednesday, 21 November 2012

Pumpkin Spice Cupcakes with Maple Cream Cheese Frosting

Happy Thanksgiving (tomorrow) to all my American friends and family!

In Canada we celebrate Thanksgiving in October.  I had always thought that we celebrated first because we were further north and the harvest came sooner.  From what I've read on the old reliable interwebs, that might be the case but it took us a long time to finally settle on the second Monday in October, something I had never heard of.  In England, we celebrate the Harvest but it seems more of a religious celebration within the Church of England than the big family gathering that has developed in Canada (and there's no day off work!)  My extensive research (this kids website) explains how Thanksgiving first derived from the Europeans.  So concludes the thorough investigation into why Americans and Canadians celebrate Thanksgiving on different days.  I'm just glad I have an excuse to share these amazing pumpkin spice cupcakes that I made from the little pumpkin I bought for Halloween (it's the ONLY time I can find pumpkin in England).


Smaller pumpkins are sweeter for baking and have more flesh to work with whereas the larger pumpkins are perfect for jack-o-lanterns and have more seeds for roasting.  I started by cutting into the pumpkin and going into autopilot began to carve it - I'm surprised I stopped before giving it two triangle eyes and a one tooth grin.


I scooped out the seeds this way but it would have been easier sliced in half, which I did part way through.  Then I laid the two halves and the top on a baking sheet but not before drizzling them in olive oil.  I placed the pumpkin in a preheated oven (200°C) for about an hour.  Then I got to work on the seeds.  There were only a few but I thought they might make a nice garnish for the cupcakes.  I did come home from Canada a few weeks ago with a giant bag of candy corn and mini candy pumpkins which would have looked nice but they were devoured in the first week of being back in England.


For the seeds I simply rinsed them in a colander, dried them with paper towel, laid them on a baking sheet and sprinkled them with salt and pepper.  I placed them in the oven with the pumpkin and set 10 minutes on the timer.  They needed a further 10 minutes after that but just keep an eye on yours - I like mine quite crispy but the edges were starting to burn at 20 minutes. 


When the pumpkin was ready (a knife should go into it easily) I scooped out the flesh into a bowl and blended with my hand mixer until very smooth to make a puree.  The puree will keep in the fridge for a couple of days or you can freeze it if you want to use it at a later date.  It's great for so many things (check out this blogger's post) and I just may use some of these ideas for my leftover puree.  I definitely don't want to waste any!


Now for the best part - the cupcakes!!  These were one of the best cupcakes I've tried (and I've tried a lot!)


 I struggled with the frosting though.  It was my first attempt at a cream cheese frosting and after 2 failed batches I gave up.  Otherwise my recent gym visits (0) would need to increase to an amount that is just completely unrealistic.  Because when I say "failed" I mean that the consistency wasn't right for piping onto the cupcakes; it just sort of slid down the sides, but the consistency was, however, perfectly fine for eating with a spoon!  Oh dear!  I'm not sure what went wrong.  I went with a recipe I found on All Recipes that had great reviews but mine turned out very liquid-y.  The first batch went wrong because when my hand mixer ceased to work I thought the food processor would blend everything and it pretty much liquefied it all.  I should really know my kitchen tools better.  I added more icing sugar but you can see in the photo above, the icing is still sliding down the sides.  For the second batch I bought this:


I'd really like to hold out for something better that will last for years because this is the 3rd hand mixer I've had.  I'm going to do a little research and add it to my wish list.  Somehow with this new mixer I still managed to ruin the second batch.  It was much better than the first but I think I gave the maple syrup a whizz with the butter and cream cheese without adding any icing sugar and in doing so, liquefied it.  I think if I made this again I would skip the syrup altogether (you could hardly taste it) and use maple flavouring instead (like so many reviewers suggested).  Try this one or another recipe you know of and I will share my version when I get it right!  If anyone knows how to keep the icing sugar in the bowl when mixing please let me know.  It looked like CSI had been dusting for prints in my kitchen when I finished.  The little clean rectangular spot is where my camera was sitting (it's no wonder I'm not allowed to get a big fancy expensive one).


 Definitely try the cupcakes - they are great even without frosting (this coming from someone who used to make a bowl of the stuff just to eat it with a spoon - don't judge).


Recipe - yields 12 cupcakes

1 cup flour
1 teaspoon baking powder
1/2 teaspoon baking soda
1/2 teaspoon salt
1 teaspoon ground cinnamon
1/2 teaspoon ground ginger
1/2 teaspoon ground cloves
1/2 teaspoon ground nutmeg
2 large eggs
1 cup pumpkin puree
1/2 cup granulated sugar
1/2 cup lightly packed brown sugar
1/2 cup butter

In a bowl whisk together all dry ingredients.
In a large bowl, with a handmixer, cream together butter and sugars.  Add in eggs on at a time.
Slowly add in dry ingredients and stir with a wooden spoon.
Divide equally between muffin cups and bake in a preheated oven (180°C) for approximately 20 minutes or until a wooden toothpick comes out clean when inserted into the middle cupcake.

These cupcakes are light and fluffy and have a taste of pumpkin pie.  Absolutely delicious and a perfect addition to any Thanksgiving meal (or as a meal on their own? I made them Sunday and there are 2 left).

Can anyone help me with my cream cheese frosting hiccup?  How do I keep the icing sugar from covering my entire kitchen (I feel like I need to hang plastic sheeting before I start!)  What's your favourite Thanksgiving dish?  Mine is definitely the turkey...no wait, the sweet potatoes...no the pie, definitely the pie...do I have to choose?  I like it all!


Tuesday, 20 November 2012

Going Bananas


Yesterday, a friend asked me: "What can I do with bananas?"  Hers were starting to go off so I suggested she stick them in the freezer and I'd write this post.  Coincidentally, I had made banana bread last week as I had about 8 bananas cluttering up my freezer.  Anytime a banana starts to look like this in the fruit bowl:


I pop it into the freezer to be dealt with a later date.  They're great frozen just as they are - taste just like ice cream.  Or in a smoothie - add some yogurt and a handful of berries (fresh or frozen) and blend.  But my favourite thing to make with them is banana bread.

When the stash of bananas starts to overtake my freezer I take it as a sign, stick em in a bowl to thaw and get cracking on the rest.

They'll just slip right out when thawed or you can peel them with a knife if you can stand the cold!

Or messing up the rest.  I tossed in a cup of flour into the wrong bowl.  There is not enough counter space in this kitchen people!


I wanted to add some chocolate but I didn't have any chocolate chips so I used a portion of this giant chocolate bar we got as part of a wedding present (it accompanied a cherished Hudson Bay blanket that my aunt brought over from Canada and lugged around to several hotels - but funnily enough, the tag says it's made in England!)  Anyway - I broke it into chunks and stored it in the freezer back in August and remembering that I had it, took a few chunks out, placed them in a plastic bag and broke them up using a hammer. (Place a towel underneath and do it on a surface your not too worried about - I had visions of my counter top splitting in half so I broke them up on the laminate floor - maybe place them on a wooden chopping board)


I doubled the recipe and made 24 muffins.  Both the bread and muffins can be frozen (I wrap the bread in foil and store the muffins in a tin).  The muffins are great for lunches; just take one from the freezer and pop it into a packed lunch and it will be thawed by the time lunch rolls around.


 Recipe (makes enough to fill 2 bread tins)

Ingredients 
2 cups all-purpose flour
1 teaspoon baking soda 
1/2 teaspoon baking powder
1/2 teaspoon salt 
1 teaspoon cinnamon
1 cup white sugar 
1 teaspoon vanilla
2 eggs, beaten 
1/4 cup butter, melted
4 bananas, mashed 
1/2 cup walnuts (optional)
1/2 cup chocolate chips (optional) 

1.  Grease and flour 2 loaf pans (I prefer to use wax paper bread tin liners) and preheat oven to 350°F or 175°C.

2. Whisk together flour, baking soda, baking powder, salt, cinnamon and sugar in a large bowl.  Mix in slightly beaten eggs, vanilla, melted butter and mashed bananas.  Stir in nuts and chocolate chips if using.

3.  Divide between 2 tins and bake for 45 minutes to an hour or until toothpick inserted in the middle of the loaf comes out clean.

Any other ideas for using old bananas?  Or any other favourite banana bread recipes out there?  Please share!  This isn't my great-grandmother's grandmother's recipe or anything, I adapted it from one I found on All Recipes, so if you have any tried and tested versions of your own, I'd love to hear about them!


ShareThis