Friday 28 December 2012

A Réveillon Recap, Christmas Lunch and Some Forced Boxing Day Shopping

Réveillon is what many French people do to celebrate Christmas Eve.  As a child, my paternal grandparents would host and we would eat a big buffet dinner, which included tourtière, stay up until midnight and open all of our gifts.  It was a strange idea to me to find out that many in England go out on Christmas Eve as mine was always so family orientated.  It never even crossed my mind that anything would even be open!    So, as it was our first Christmas together in our house in England, I wanted to retain this tradition.  The two of us stayed in, ate a buffet made for 20 and watched many a Christmas television special.  Though opening gifts was put off until morning- not my idea!

My favourite meal is buffet.  And I didn't disappoint myself.  Ours included tourtière, homemade fried rice, honey glazed ham, Caesar salad, a veggie tray, and some olives and nuts thrown in for good measure. 


The veggies, nuts and olives are pretty self explanatory but the fried rice is something my mom has made at most of our Christmas Eve celebrations, so this recipe comes from her.  I've tried it a few times.  It's never worked out, always dry, hard bits of rice in it, Mmm.  So Christmas Eve, when I'd mixed everything according to the recipe I called my ma to ask if it should look so dry: Did you add the water from the mushrooms? she asked.  Yes.  Well apparently that was good.  A half an hour later when it was still really dry and uncooked, I called her back: Well, how much water did you put it in? Just the water from the mushrooms.  Well apparently that was not good.  Her recipe calls for 2 cups of water.  That part is not written down on my recipe.  Happy to report it was salvageable and all turned out great.  The recipe is at the end of this post.

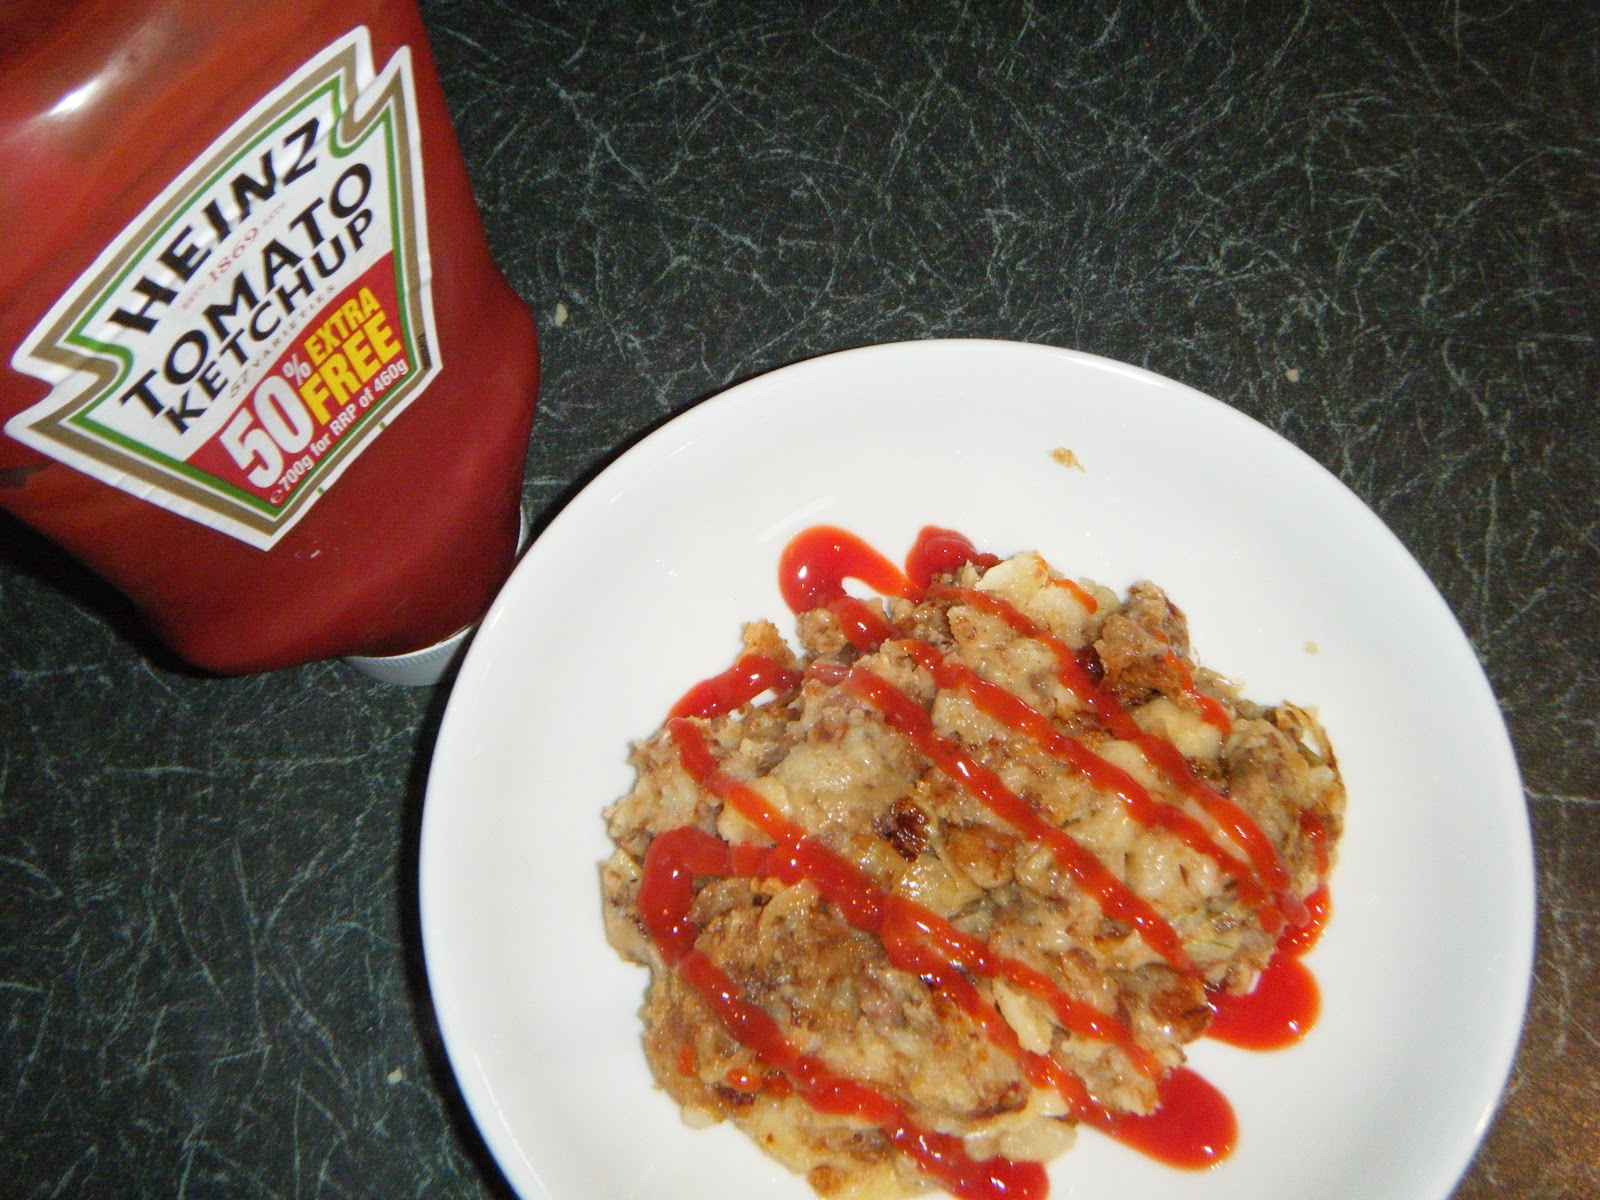
The tourtière is also my mother's recipe.  I asked her if I could share it because sometimes people can be pretty reluctant to share a family recipe or something they created themselves.  Not me though, wouldn't bode well for a food blog anyhow.  And she's good with it too.  She figures she won't go making a mint with her secret recipe and don't you go doing that either - not without cutting her a slice of the pie (see what I did there??!) Anyway, it also appears at the end of the post.

Christmas day was quiet and relaxed.  We opened gifts (yep, a new camera for me and a Kobo for the fella), ate a lovely breakfast, and went for a walk with the pups in the woods.  I put a turkey crown in the oven at about noon and we ate at around 4pm (only an hour behind schedule) with the husband and the father-in-law.  I tried to stick to a few traditional pieces for the side dishes; roast potatoes, mash, roast parsnips and carrots, sprouts, pigs in blankets and stuffing.  I'd love to share a homemade stuffing recipe (plan early for next year?) but my easy to please other half insisted on Paxo brand stuffing.  Sigh.


We used our wedding china, which made me get a little Monica Geller on everyone's ass and turn into crazy plate lady.  When plates got passed around the table, I watched with a squinted eye and hunched, très tense, shoulders and let out a "CAREFUL!" to which the husband just responded to with a glare coupled with raised eyebrows.  Oh, yeah, I'M the clumsy one.  


I also tried Christmas pudding.  When we were out doomsday prepping Christmas food shopping, the puddings were on sale and when I asked the husband if I should just make my own he shouted down from one end of the aisle that I would have had to start months ago.  Oh.  Right.  I tried to tell him Gino D'Acampo made one in the microwave on TV last week but he wasn't having it.  Well Tesco's Finest for a quid will do then.  And it did.   Maybe one day there will be a post about my very own Christmas pud - though don't hold your breath.

Boxing Day was going to involve eating a lot of leftovers, watching films and just general laziness.  Instead, it involved getting dressed, going running (so much food guilt!) entertaining and going shopping.  My hard selling tactic of bringing our last little pup to a friend of ours on Christmas Eve for a lookey loo worked and they were coming over for a "visit" which I was sure meant that they would be leaving with her.  This turned out wonderfully-we know she has gone to a great home and we can all go for walks together sometime!  Once they had left, and since I had been running earlier, I made myself a giant plate of leftovers and settled in to watch a little Turner and Hooch (so fitting).  I was going back for my second helping when the fridge light went out.  There was no whirring sound.  Nothing.   Our fridge had given in.  It was also probably a sign to STOP EATING!  It was 4:30pm.  By 5:30pm we were back home, with a new fridge and having not been deterred by the events, I was tucking into my meat pie and watching the rest of Turner and Hooch on a plus 1 channel.  It was probably the salesman's easiest sell of the day.  I like it - the fridge part is on top and the freezer on the bottom.  My old lady back is thankful for that.

So there ya have it.  Christmas 2012.  Done.

Fried Rice
1.5 cups of white rice 
1 cup of chopped celery
1 chopped onion
1 chopped green pepper
1 package of onion soup mix
1 can of mushrooms (and the water)
2 tbsp of soy sauce
4 tbsp oil
2 CUPS OF WATER

Mix everything together and cook, covered for about an hour at 180 degrees Celsius.  Check it and stir about half way through cooking. 

Tourtière

1.5 pounds of mince (can be a mixture of beef, pork and veal - I used beef and pork)
1 finely chopped onion
1/2 cup of water
1 garlic clove, crushed
1 tsp salt
1/4 tsp celery salt
1/4 tsp ground cloves
 ready-made shortcrust pastry

Place all of the ingredients in a large saucepan.  While stirring, bring the mixture up to a boil.  Simmer, uncovered for about 20 minutes.  Continue to stir while the mixture simmers.  While the meat cools, prepare pie tins.  

On a lightly floured surface, roll out the dough so it is slightly larger than the pie plate.  Carefully place the dough over the pie plate and trim to leave about a half inch of overhang.  Fill the pie with meat and prepare a topper.  For a decorative vent, cut with a cookie cutter before laying the top crust on the pie.  Use a fork to crimp and form a seal. 

The pies can be frozen (for about a month) until ready to be baked in the oven - about 20 minutes or until pastry is golden brown at 190 degrees Celsius.


Thursday 27 December 2012

Christmas Dinner Leftovers

I hope everyone had a lovely Christmas day celebration.  Ours was quiet but filled with wonderful food, flowing drink and lots of puppy cuddles (we still had one left on Christmas day but we are now a two dog family).  And Santa stopped by too!

Chances are, like me, you have a fridge full of turkey dinner leftovers.  I love leftovers.  I'm sure I have mentioned this before.  I'm pretty sure I cook purely to have leftovers.  We toyed with the idea of an M&S Christmas dinner since there would only be three of us and it would take all the of stress out of Christmas day as all that needs to be done is a little maths to know when to put things in the oven and when to take them out (so only a little stressful - I hate maths).  All the trays and tins can be thrown away and there's very little cleanup.  But the downfall - no leftovers.  It's nice to just pile up a plate with last night's dinner but what I really like to do it create an entirely new dish.  Nothing fancy - just something a little different than the day before. 

Sometimes I wonder if I'm blogging about something too simple - not interweb worthy (though there is A LOT of stuff out there that isn't quite web worthy so...) but if someone hadn't shown me then I couldn't show you.  My roommate at university introduced me to this fine mashed potato delight.  This is a perfect midnight snack. All that is required is leftover mash, a chopped onion and some grated cheese.  Then just fry the onion until browned, add the mash and fry that too until it gets brown and crispy and finally stir in the cheese just before serving.  I douse it in ketchup.  Perfectly comforting.  Though it doesn't pose well for photographs.


 I also whipped up a little quiche when some friends stopped by for lunch today.  A little sceptical when I first saw this in a Morrison's free magazine about a year ago because one of the ingredients is frozen chips but I gave it a go and was glad I did.  Easy and delicious - my favourite combination.  I would have used leftover roast potatoes but I had those with breakfast yesterday - mmm hashbrowns.

So, just layer the bottom of a bread tin with frozen chips (or chopped roast potatoes), sprinkle some chopped ham on top (or bacon or sausage), add some grated cheese and top the whole thing off with a mixture of beaten eggs, cream and spinach.  I baked it for about a half an hour at 200 degrees Celsius - until the topped had puffed out and was golden brown.  I used a wax paper liner in the bread tin to be able to pull the quiche easily from the tin and I sliced it once cooled slightly.Went down a treat with my 1 year old goddaughter, who gobbled up two slices, and everyone else enjoyed it as well.   


You might be thinking, wow that picture is so clear and in focus and wondering if I've stolen it off the web or something (or not).  But it is and it's mine.  And it didn't require any strategic flashlighting.  A little hint to what Santa brought me for Christmas.  I'll recap our holly-days tomorrow; what we ate, drank and even a little impromptu Boxing day shopping.  I know you're dying to know!  For now I'll get back to taking pictures of "nothing" as the husband puts it.  And well, these two.


Friday 21 December 2012

The Last of the Christmas Baking

Hark! The Herald angels sing, Chloé is done with her baking!

Over the last few weeks, I have made 9 different varieties of Christmas goodness; some made with ease and others proving a little more difficult.  Starting my baking ahead of time was good in that I was able to take my time and even try a few new recipes that I wouldn't have tried if I were baking everything in one Great British Bake-off style night.  I was also able to squeeze in a tourtiere (French-Canadian meat pie) making session the other day and made 3 in a couple of hours (helps that I buy ready made pastry!).


A little OTT, Yeah you know me!
I took all of the cookies from the freezer last night and with a little solo assembly line going, made up a few tins for friends and family.  It's my favourite gift to give at Christmas and not everyone has time or enjoys baking as much as I do and, really, we can't eat all of that! (well we can, but we shouldn't)

Now there's just the Christmas dinner to think about.  We are currently watching Nigel Slater's 12 Tastes of Christmas and the husband has just asked if we can "have that".  "Have what?" I said.  "All of that" gesturing to the television.  It's something fancy, looks like brandy snaps and fruit.  He's teasing me (I hope) but I still don't know what to make for Christmas dinner.  I will probably get a turkey in the end but with only 2 of us I feel like I should tone it down slightly.  What is everyone making?  Pork roast, beef, turducken, tofurky or Chinese food??

These last two cookie recipes I'm going to share are easily done in about an hour.  They're great if you need to bulk out what you already have.  Same recipe just different fillers.


White Chocolate and Cranberry Cookies (adapted from All Recipes)

1/2 cup butter, softened 
1/2 cup packed brown sugar 
1/2 cup white sugar 
1 egg  
1 tablespoon Cointreau 
1 1/2 cups all-purpose flour 
1/2 teaspoon baking soda 
1 cup white chocolate chips 
1 cup dried cranberries

1. In a bowl, whisk flour and baking soda and set aside.
2. Cream butter in a large bowl and then blend in both sugars.  Beat in egg and Cointreau.  
3. Slowly add the flour mixture to the sugar mixture until fully incorporated.
4. Stir in white chocolate chips and dried cranberries.
5. Bake in a pre-heated oven (190°C) for 8-10 minutes (for a chewy cookie take out while still doughy). Allow to cool for 1 minute and transfer cookies to wire rack.

Change out 3 ingredients, follow the same steps and you get:
 

Chocolate Chunk and Walnut Cookies

1/2 cup butter, softened 
1/2 cup packed brown sugar 
1/2 cup white sugar 
1 egg  
1 tablespoon vanilla
1 1/2 cups all-purpose flour 
1/2 teaspoon baking soda 
1/2 cup chopped walnuts
1 cup chocolate chunks (I used a large bar, placed in a resealable bag and broken up with a hammer)

1. In a bowl, whisk flour and baking soda and set aside.
2. Cream butter in a large bowl and then blend in both sugars.  Beat in egg and vanilla.  
3. Slowly add the flour mixture to the sugar mixture until fully incorporated.
4. Stir in white chocolate chunks and walnuts.
5. Bake in a pre-heated oven (190°C) for 8-10 minutes (for a chewy cookie take out while still doughy). Allow to cool for 1 minute and transfer cookies to wire rack.

I hope you have all finished (or are nearly finished) shopping, baking and all around prepping for Christmas and ready to start relaxing and enjoying the festivities.  I attempted a bit of a shopping trip today - I should never have left the comfort of my laptop.  Online shopping forever!


Thursday 20 December 2012

A Cocktail To Toast My Mother

It's the mom's birthday today (HBD Ma!) and in honour of her I have prepared this festive cocktail.  Poinsettias are her favourite so when I found this recipe on Mix That Drink I had to give it a try.  It's just like they describe; easy to drink and down right festive.  Not particularly birthday-esk but that's what happens when you're born in December.

This is all you need.  They call for a chilled champagne flute (and well, champagne but I went with half price £5.99 Prosecco, we'll save the Moet for New Year's) but since I don't have any, I used this beautiful crystal martini glass (only the best for my mom - and since I skimped on the champers...)

Anyway, a half a shot of Cointreau, 3 shots of cranberry juice topped off with champagne Prosecco and as Gino D'Campo says, "Da job is done!"


When I was visiting the mom in October I bought her a charm for the bracelet I bought her last Christmas.  I hid it in her bottom dresser drawer and about a week later I got a phone call: "Did you hide a charm in my dresser?"  Me: "Uh Happy Birthday...In November"  And before she'd even called me, it was on her wrist; "Can I wear it now?"  In fairness, she did present me with my Christmas present when I walked in the door back in October - though she has doubled up and there's a Christmas present beautifully wrapped (by Amazon) under my tree from her.  I did not double up, so here's my toast instead:

Happy Birthday Mom!
You have taught me (nearly) everything I know and I am so proud to call you my mother.  You are so smart. funny, thoughtful and caring and have busted your arse for us all these years and I love you for every hardworking moment. 
Short and sweet, eh?  Mom stop crying.  

Wednesday 19 December 2012

It's Not Christmas Without Sugar Cookies

I love sugar cookies.  Actually, I should re-phrase that: I love decorating sugar cookies.  They are definitely not my favourite in the taste department.  Of course they taste great - there's just a long list of cookie loves ahead of these guys.  It's the decorating that really gets me going.  It doesn't take much.


I make them every year because out of all the Christmas baking they look the part the most with the festive shapes and all the colours.  I also really enjoy time set aside to decorate.  Last year, I had a terrible cold so I stayed home to "rest" (you'll have to strap me to my deathbed).  So probably after some light vaccuming and a few loads of laundry, I got my decorating on.  I had baked the cookies a day earlier and they were ready to be covered in sprinkles and glitter so I got everything ready and took it to the dinning table and began what would be a couple of hours of painting and sprinkling and icing the cookies.  W walked in and saw me surrounded by my creations and said "You need some kids!" (we're working it on people).  This is a fun activity to do with kids, sure, if you don't want them to look just right.  I'm kidding here - I love the handmade look and how each cookie looks different.


Every year, I've made them a little differently.  The recipe and shapes stay the same but the colours and sprinkles are changed up, mainly because not one supermarket seems to carry the same thing from year to year but also because I like to try out different styles.  One year, I went very traditional with greens and reds, another year was pastel colours and 'hundreds and thousands' and last year I found some cute snowflake sprinkles and red and green sugar.  This year I've gone for wintry with a white and silver theme and some blue glitter.


This was very much like the Toblerone shortbread adventure from last week.  A few slip ups and some cookie casualties (don't worry - I saved 'em!)  but I've made the mistakes so you don't have to.  When you think to yourself  "I'm sure I didn't line the cookie sheets with wax paper last year", think again and go and buy some wax paper.  Don't even try a few without it.  It won't work - they will stick like glue and break and you'll be forced to take 1 (or 6) for the team.  What did you have for dinner last night?  I had a half a dozen sugar cookies.


Handle the stars very carefully; a few were fully decorated before they decided to take the plunge. Face down.


My entire kitchen was covered in glitter and sprinkles and little silver balls.  And just for fun I threw some all over the counter.


The recipe has been scribbled down in my notebook for about 5 years (most likely given to me by my mother) with very clear instructions like mix in flour etc and divide in half, wrap, fridge, roll, cut, 1cm, 10 min but I'll try and be a bit more specific down below.  The decorating, however is recipe free and entirely up to the creator.  Go get yourself some kids and make some cookies!  ( I feel I need to be clear here - children you know, your own or some nieces and nephews will do but don't go rounding up the neighbourhood kids claiming you need them for a recipe -it won't go down well).


Sugar Cookies (adapted from my little blue notebook)

For the cookies
1 3/4 cups flour
pinch of salt
1/2 teaspoon baking powder
1/2 cup butter (softened)
3/4 cup granulated sugar
1 egg
1 teaspoon vanilla

Whisk flour, salt and baking powder in a bowl and set aside.  In another bowl, blend butter and sugar until smooth.  Add in egg and vanilla and mix together.  Slowly stir in flour mixture a little at a time until fully incorporated.  Divide dough in half and roll into large balls and flatten into a disk shape.  Wrap in cling film and set in the fridge for an hour.

Roll out on a lightly floured surface until 1 cm thick and cut with cookie cutters.  Line baking sheets with wax paper and place cookies about 2 cm apart.  Place in the fridge for about 10-15 minutes (this helps cookies retain their shape when baked).  

Bake in a pre-heated oven at 190 degrees Celsius for 8-10 minutes.  Edges will burn quickly so keep an eye on them.

For the icing
1 egg white
1 teaspoon lemon juice
1 1/2 cups icing sugar

With a hand mixer blend everything until smooth.  Cover the bowl with a dish towel as you mix to minimise the dust cloud that emerges.  Once cookies have cooled, use a small clean paintbrush to decorate.  Gently push the icing to the edges in a circular motion and decorate with sprinkles.  Alternatively, add food colouring to the icing or use a piping bag to draw designs on the cookies.

Tuesday 18 December 2012

Two Bite Butter Tarts

I always knew butter tarts were a Canadian treat but having done a little reading on the double ya double ya double ya, I found out they are actually a northern Ontario delicacy - like me!  Well, I don't know about the delicacy part (I'm more of a bull in a china shop) but I am a northern girl.  With the pastry holding all of that sugary goodness, they're pretty much a cup full of sugar.  I love it!  Sugar!  My eyes actually get bigger and spin like a cartoon character's.  This is where I'd insert a picture with my eyes photoshopped to look like spinning whirls but I don't know how to do that.  Use that old fashioned imagination and instead look at these tarts.


I have always made these using a recipe that calls for cream but I found this one on Canadian Living (where better to look!)

Before I even got started I was confused (save your jokes): How did I get mini butter tarts last year with a full sized muffin tin?  Then I remembered I only lined the pastry about half way up the sides.


I also took the easy route and bought ready made pastry.   Anything to make life that little bit easier.  I did, however think that the block pastry and ready rolled (yes, they even roll it out for you) were the same price.  Turns out they charge you that little bit extra for the privilege - something I could have done myself.


Anyway, whether you make your own pastry (show off), buy it or even buy it ready rolled, these tarts turn out amazingly gooey and sweet.  I know this because I tried about 3 before putting them in a tin and locking them away in the freezer until Christmas.  Because we haven't (not even once) been in the freezer for a few cheeky treats.  Not. At. All.  I swear!

Butter Tarts - adapted from Canadian Living

Ingredients

For the pastry:
Buy ready-made pastry :)

For the filling:
1/2 cup packed  brown sugar 
1/2 cup golden syrup 
1 egg 
2 tablespoon butter, softened 
1 teaspoon vanilla 
1 teaspoon vinegar 
1 pinch salt 
1/4 cup raisins and/or chopped walnuts

1. Mix sugar, syrup, butter, vinegar, egg and vanilla in a bowl until well blended and set aside.

2. Roll out pastry (dead easy if you buy the pre-rolled stuff! I so cheated on this one)

3. Cut out circles with a cookie cutter or a glass large enough to cover the muffin tin cups and fit each one in the bottom of the cup, lightly pressing into shape.

4. Drop a few raisins and chopped nuts into the pastry cups before filling 3/4 of the way full with syrup filling.

5. Bake at 230 degrees Celsius for between 12-15 minutes.  Filling will bubble and pastry should be golden.  Cool for one minute and transfer to a wire rack carefully taking each tart out of the muffin tin with a spatula so as not to break. 

6. Taste test the ones that break or look wonky and enjoy!

Monday 17 December 2012

Handmade Christmas

My little terraced house reminds me every day how lucky I am.  I mean, firstly I have a roof over my head.  But secondly, when my house was built in the 1880's, people had very little.  Before the invention of indoor plumbing this house had two rooms upstairs and two rooms downstairs (commonly known as a "2 up 2 down" - clever).  Now, it includes a bathroom.  Also, ours was built with an extended little kitchen but most kitchens were in the back room.  Even when electricity was brought into the home, there were very few appliances that needed to be plugged in, hence the reason we have only two sockets in each room.  There are no closets or storage areas (apart from the attic) as people didn't have "stuff" to put in them.  Therefore, I think I am lucky because intelligent, creative people invented or discovered ways to help make our lives easier.  We can easily go out (or stay in and look to the world wide web) and purchase items we need or want and not have to make them ourselves.  We don't have to grow our own food, bake our own bread, shop daily because we don't have a refrigerator or hand wash our laundry (unless it's a silk blend). This frees up an incredible amount of time.  TIME.  How do you spend your time?  I know I don't spend mine wisely.  I think there's also a lot of pressure to do more in a given day because life has been made "easier". 

I have fallen victim to "Keeping Up with the Jones"; needing the latest gizmo or gadgets or stylish piece of clothing, only to no longer use it or wear it a short time later.  We, as a society, have too much "stuff".  Watching various talk shows these past few weeks I have heard how some people spend an obscene amount of money at Christmastime.  Many of us have lost sight of what is important.  I want to live more simply.  Have only the things that are truly beautiful and necessary in the home.  Making time to appreciate the little things.

A friend of ours stopped by on the weekend and noticed that I hadn't gone overboard this year with the decorating which says something because the house is still pretty well decorated; from every mantel to the holiday kitchen mat, to the Christmas pictures in frames and wreaths on the doors and windows.  I have to admit, I wanted to curb the decorating a little and left a few items in the boxes.  I also vowed not to buy anything new and make do with what I have already because let's face it, I already have A LOT of Christmas stuff.  When the 6th plastic bin came down from the loft I realised it was all a bit much!

I've been meaning to do more for others.  Last week I purchased two big bags of food to donate to the food drive at my local Tesco and this week I will be purchasing a toy for the toy drive.  I need to remember to do more throughout the year because people are not only hungry at Christmas.  It is important to keep things in perspective, appreciate the little things (and sometimes big things) and be thankful for what we have - because someday it could all be gone.

In an effort to make do with what I have I created a few Christmas decorations for very little or no money, mostly using things I already had (and a little printer ink).

The first is this shadow box frame that usually hangs in our bathroom with a flower print inside.  I found an image I liked on the interweb and printed as a square image.  It didn't quite fit so I backed it with some brown parcel paper.  I then tipped in as many ornaments that would fit and used a little piece of berry garland to round off the corner.  Simple, easy, took about 10 minutes.  I think I spent longer looking for an image on the net (using my time wisely you see).


Earlier this autumn I created a gallery wall at the top of our stairs.  I love it because I can switch out the pictures and change with the seasons.  Again, I just searched the interweb, printed my favourites and popped them into the frames.  A tip from my super saver husband - put the print outs in a folder to use next year so you stop wasting all the printer ink!  You can also insert old Christmas cards, like the image of the reindeer.  Printer ink, saved!


And last year I made this tablecloth.  I couldn't find one I liked enough to spend 20 pounds on so I bought 2 metres of material for 5 pounds and made my own.  If you've never sewn, start (I mean, only if you want to).  It's so easy to make simple and beautiful items and so much cheaper than store bought, and you get EXACTLY what you want.


Are you making anything this Christmas?  Handmade decorations or gifts?  Will you be sticking to your budget or blowing it all?  


Friday 14 December 2012

Toblerone Shortbread: A Twelve Step Program

The cafe at my university sold ginormous shortbread cookies with a full piece of Toblerone in the centre.  Absolute heaven!  Kept me going during those 3 hour night lectures.  I haven't seen them anywhere else and always wanted to make my own.  A quick search on "The Pinterest" tells me I'm not the only one - though I didn't see any that were made with a full size Toblerone.  Probably due to the insane amount of sugar and calories in one little bite!  So I too went the mini Toblerone route since having bite sized Christmas cookies are great for a (somewhat) guilt free biscuit buffet.


Step 1 - Get ingredients ready.


Step 2 - Beat butter and sugar and then stir in flour mixture.


Step 3 - When shortbread turns out really crumbly, watch video from The Joy of Baking website (which is where you can find the recipe I used for shortbread) to see where you went wrong and shout "HALF a cup of sugar? What? Really?!"  Then re-read recipe to find out - yes indeed, half a cup of sugar NOT 1 cup.

Step 4 - Run down to Tesco to buy more butter.  I bought 6 because they were on sale and I'm bound to need more at some point.  This won't be the only mistake.

Step 5 - Get ingredients ready (again) and measure out HALF a cup of sugar.


Step 6 - Follow instructions carefully and make sure butter is smooth.


Step 7 - Watch as the dough goes crumbly (again) and cry a little on the inside.

Step 8 -  Get a brain wave (they sometimes happen, infrequently yes, but they do) and place the crumbly dough in a re-sealable bag and add little water.  Gently smoosh everything around in the bag until the dough looks more like the dough in the video.  Form dough into a ball, place in plastic wrap and flatten into a disk shape.  Refrigerate for an hour or overnight because you're going out for dinner and you can't spend all your time baking in the kitchen.  Note the difference:


Step 9 - Roll out dough and cut into shapes using a cookie cutter.  Halfway through, when your black jeans are covered in flour, remember to put on your apron (this should really be step 1).


Step 10 - Taste test Toblerone triangle.  If determined to be of good quality (it might take a couple to be sure) place one triangle in the centre of each cookie, place on a baking tray and stick in the fridge for 15 minutes.


Step 11 - Bake in the oven while crossing your fingers that they taste okay when done.

Step 12 - Give yourself a good ol' pat on the back when they come out looking  beautiful and tasting absolutely fantastic.  Pat, pat, pat.


Thursday 13 December 2012

Peanut Butter Cookies

All aboard the baking train.  Woo woo - I've been busy today.  I'll start with a favourite - ah, who am I kidding, they're all favourites!

When I was back in Canada, I picked up a large jar of Kraft peanut butter, among other Canadian favourites.  And although you can use any peanut butter for this recipe, for me, this is the best.  These cookies remind me of our school packed lunches as children, as my mom used to bake them for us quite a lot.  Not traditionally a Christmas cookie per say, I do like to add them to the collection purely for the memories.

Another oldie but a goodie from the mom (adapted from Better Homes and Gardens, no doubt) I give you:
 
Peanut Butter Cookies 

3/4 cup butter (room temperature)
1/2 cup brown sugar (lightly packed)
1/2 granulated sugar
1 large egg
1 teaspoon vanilla
3/4 cup peanut butter
2 cups flour
1/2 teaspoon baking soda
1/4 teaspoon salt

In a large bowl, beat butter for about 1 minute.  Add both sugars and cream together until smooth (it goes crumbly before it gets smooth).  Beat in vanilla, egg and peanut butter.  In another bowl, whisk together the flour, baking soda and salt.  Slowly stir in the flour mixture until incorporated.

Roll into balls (I weighed them at 20 grams each) and coat with white sugar.  Place on a baking tray about 2 cm apart and press with a fork.  Bake for 8-10 minutes at 180 degrees Celsius.

Makes approximately 3 1/2 dozen cookies.


So, tell me - what do you include in you Christmas baking? Stick to the same things every year or switch it up?

Wednesday 12 December 2012

Cranberry Blueberry Chutney/Relish/Jam

I would love to be getting on with my Christmas baking but with the puppies, I'm finding it very difficult to get anything done!  Yes, I'm wearing pyjamas and it's midday.  I could put them in their crate but then I wouldn't get to cuddle them and they're so cute and widdle and snuggly wuggly (insert more baby talk here).  I'm one more Facebook mobile upload away from being the crazy dog lady (what? I'm already there?!)


So food for thought - and this actually made me go "hmm" - What makes a chutney, chutney?  A jam, jam?  And a relish, relish?  Research I might take on this afternoon while confined to puppy cuddles but I thought I could spur a little discussion on here.

On Monday, I made a quick cranberry sauce to accompany an orange chocolate mousse.  Having only used a little bit, I decided to turn the rest into a hmmm, chutney? relish? jam?  Maybe it depends on how it's put to use?  I made a tart with it but also had a little on crackers.  It would be delicious on toast and a great sauce for turkey (oh no, is "sauce" now in the mix?).


Chicken and Cranberry Goat's Cheese Tart


Cranberry and Blueberry Chutney/Relish/Jam or Sauce

1 cup fresh cranberries
1 cup granulated sugar
1/2 cup frozen blueberries 
1/4 cup marmalade
1/4 cup water
1 teaspoon cinnamon
1 teaspoon ground ginger

Bring cranberries, sugar and water to a boil.  Stir in marmalade and allow sauce (relish, chutney, jam?) to simmer for about 10 minutes.  Add blueberries and spices and reduce until when the bottom of the pan is scraped with a wooden spoon the sauce (relish, chutney, jam?) divides in two and the pan is visible for a short while.  Transfer to a container to cool and serve with turkey, chicken, crackers, on toast, on pastry, with sausage, and anything else that might go well with it.  The sweet, tarty flavour is a great contrast to a strong cheese and I love the sweet and savoury combo.

So, where do you stand on the chutney, relish, jam debate?


Tuesday 11 December 2012

Roast Parsnip Soup

There was a thick frost on the grass this morning when I woke.  Without my glasses, it looked a little like snow.  It was not, but better than rain.  Either way, it's cold out there and after a long walk with the dog I needed something to warm me through.  I decided a nice hot creamy soup for lunch would do the trick and soups are so easy - just toss what you got in a pot, cover with water and/or stock, simmer and blend.  I had parsnips so this is the route I took to get here:


Peel and roughly chop parsnips and lay on a baking tray (I used about 8 parsnips).  Drizzle with olive oil and sprinkle a little salt and pepper.


Roast for about 20-30 minutes.  I did this at 200°C - I seem to cook a lot of things at that temperature.

Yep - I have a Christmas oven mitt.
In a large pot, sweat a small chopped onion in some olive oil.  Add stock and water (I used about a half litre of each), a pinch of coriander and cumin and bring to a boil.  Toss in parsnips when roasted and ensure they are covered by stock.  Add more stock/water if not, but not too much as you can always add more once blended to adjust the thickness of the soup to your liking.  Simmer for 20 minutes or so.

Allow soup to cool slightly and then blend with a hand blender (or put it in a blender).  Stir through about a half cup of single cream - completely optional and I only put some in because I had some but it really adds to the flavour (and your hips so leave it out for a healthier version).


The soup had a smooth velvety texture and was absolutely delicious. I've divided what's left into individual containers and put them in the freezer.  A few minutes in the microwave is all it needs to be enjoyed all over again.  This is up there as one of my favourite winter soups, right beside sweet potato and butternut squash.  What's your favourite?

ShareThis